


Millions of Windows 10 users are facing an annoying choice: keep using an unsupported PC or pay for a replacement that may not feel necessary yet.
It is a frustrating position to be in, forced to choose between an insecure system and a $500 invoice for a new machine. However, as I reported earlier this month, following the launch of Google’s $3 revival kits, there is a third way gaining serious momentum: ChromeOS Flex.
This isn’t just a software patch; it is a total personality transplant for your laptop. By stripping away the bloat of a traditional OS and moving the heavy lifting to the cloud, Google is effectively turning aging e-waste into snappy, cloud-first workhorses. If your daily life revolves around a browser, spreadsheets, and streaming, this transition might be the smartest move.
- Preparing for the pivot
- Step 1: Get Chrome on your current computer
- Step 2: Install the Chromebook Recovery Utility
- Step 3: Create your bootable USB drive
- Step 4: Boot your old laptop from the USB
- Step 5: Try it before you commit (optional but recommended)
- Step 6: Install ChromeOS Flex
- What to expect once you’re up and running
Preparing for the pivot
Before you dive in, a bit of professional due diligence is required. Google maintains a list of certified models that are tested for stability and performance. While ChromeOS Flex can run on non-certified devices, functionality is not guaranteed.
You will also need a sacrifice USB drive with at least 8GB of space. Keep in mind that the installation process will completely wipe this drive and everything currently on your laptop. If you have photos or documents on that Windows 10 machine that aren’t backed up to the cloud, now is the time to move them to an external hard drive.
Step 1: Get Chrome on your current computer
You’ll need Google Chrome installed. If you’re already a Chrome user, you’re set. If not, head to chrome.google.com, download the browser, and install it. It works on Windows, macOS, and Linux.
Step 2: Install the Chromebook Recovery Utility
With Chrome open, visit the Chrome Web Store and search for “Chromebook Recovery Utility.” Add it to Chrome as an extension. Once it’s installed, click the extensions icon (the small puzzle piece icon in the top-right corner of Chrome), and open the Chromebook Recovery Utility from the dropdown menu.
Step 3: Create your bootable USB drive
Plug your USB stick into your current computer. In the Recovery Utility window, click “Get Started,” then select “Choose a model from a list.” In the manufacturer dropdown, choose “Google ChromeOS Flex,” and in the product dropdown, choose “ChromeOS Flex.”
Hit Continue, select your USB drive from the list, and click “Create Now.” Chrome will ask for permission to make changes to your device. Say yes. Then sit back. Writing the ChromeOS Flex image to the USB stick takes some time. When it’s done, safely remove the USB drive.
Step 4: Boot your old laptop from the USB
Now take that USB stick over to the laptop you want to revive. Shut it down completely. Plug in the USB, then turn the laptop on while repeatedly pressing the boot menu key. This key varies by manufacturer; common ones include F12, F2, Esc, or Del, but your device’s manual or a quick web search for your specific model will tell you the right one.
From the boot menu, select your USB drive as the boot device. If you see the ChromeOS Flex logo appear on screen, you’re on the right track.
Step 5: Try it before you commit (optional but recommended)
When ChromeOS Flex loads, you’ll land on a welcome screen. Before you install anything permanently, Google gives you the option to “Try it first,” essentially running ChromeOS Flex live from the USB drive without touching your existing operating system or files.
This is worth doing to confirm that your Wi-Fi card, keyboard, trackpad, and other hardware all function as expected. Bear in mind that live booting from USB tends to be noticeably slower than a full installation, so don’t judge the final performance by this preview.
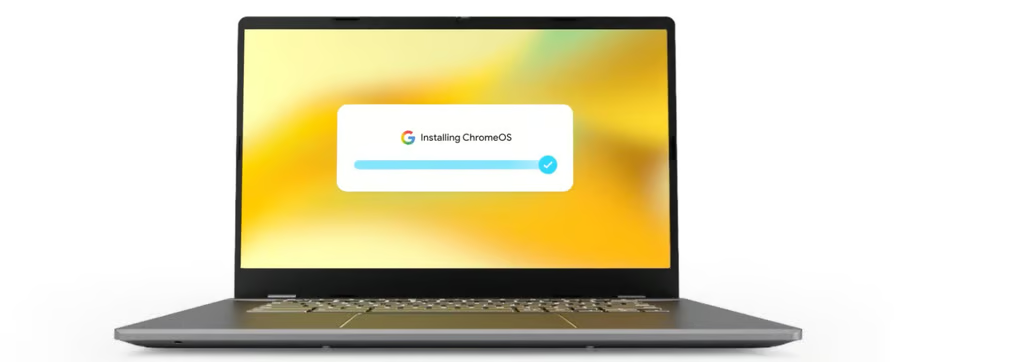
Step 6: Install ChromeOS Flex
When you’re ready to commit, click “Install ChromeOS Flex” either directly from the welcome screen or by signing out of the live session and selecting the install option at the bottom of the sign-in screen. Read the on-screen warning about data erasure carefully, confirm, and let the installation run.
When it’s finished, the laptop will shut itself down. Remove the USB drive, then power the machine back on. ChromeOS Flex will boot up directly from the internal drive, and according to Google, that should take under 10 seconds.
Follow the on-screen setup steps, connect to your Wi-Fi network, and sign in with your Google account to run ChromeOS Flex.
What to expect once you’re up and running
The interface will feel familiar if you’ve ever used a Chromebook.
There’s a taskbar at the bottom of the screen with a launcher button on the left, a notification and system tray on the right, and your favorite apps can be pinned along it just like in Windows. Window snapping, two-finger scrolling, and video calls all work as you’d expect.
If you use Chrome on other devices, your bookmarks and saved passwords will carry over automatically when you sign in. ChromeOS Flex can also connect with an Android phone, pulling in notifications and sharing Wi-Fi credentials between devices, though iPhone users will need to rely on a shared Google account for bookmarks and passwords rather than deeper integration.
One limitation worth repeating from our earlier coverage: ChromeOS Flex does not support Android apps. The experience is built around the web, Chrome, Google Workspace, streaming services, and cloud-based tools. If your work lives in a browser, it’ll feel fast and clean. If you depend heavily on Windows-only software or processor-intensive local applications, this may not be the right fit.
For the majority of people who primarily use their laptop to browse, email, video call, and work in Google Docs or similar tools, though, the result is a machine that boots fast, updates automatically in the background every four weeks, and doesn’t accumulate the slowdown that plagues aging Windows installations.
Also read: Nvidia’s reported AI laptop chip plans show how the next PC race may hinge on tighter CPU, GPU, and AI integration.