2Meet the DL380 Gen9

The most obvious feature of the DL380 Gen9 is the space for storage drive bays. There are three, of which only one in this server is populated. The bays on the left of the photo and in the center are empty. There are two hard drives and six blanks on the right. There’s also a small front panel. On the outside edges are the rack-mounting points. If you flip down the lower part, it exposes a rack-mounting screw. If you look on the top cover of the server toward the back, you’ll see the latch for quick removal of the cover.
3The Control Panel
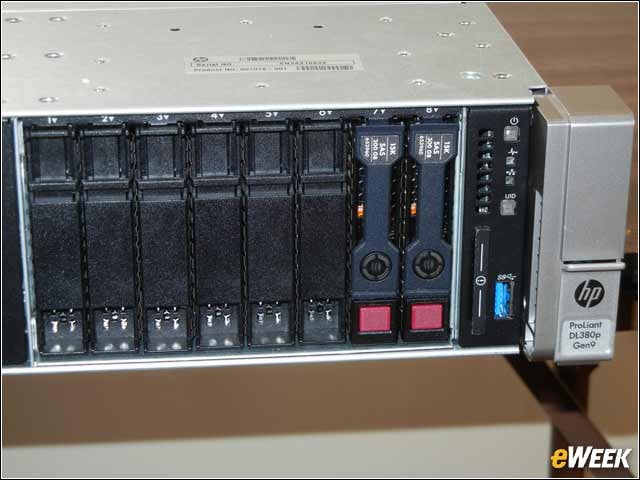
The drive bay on the right of the front on this server contains a drive cage with two hot-swappable SATA drives. There is room for a total of eight. You can remove a drive by pressing the red button and lowering a lever on the front. You can also see the power button and the unit identification (UID) button, as well as indicators for server health and network activity. There’s also a USB 3.0 port in the corner.
4The Blue Modular Backplane
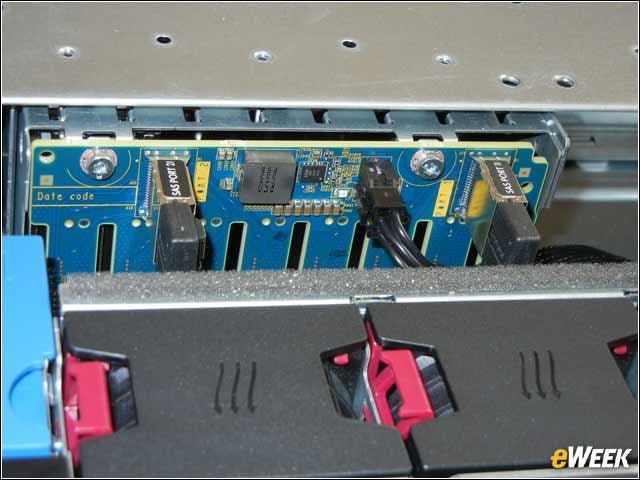
Directly behind the drives on the front of the server is a backplane (it’s blue in the photo), into which the drives plug. SATA cables attach to the backplane and connect to the drive controller. Just in front of the backplane are the hot-swap fans. The pink levers in front of the backplane are for removing the hot-swap fans.
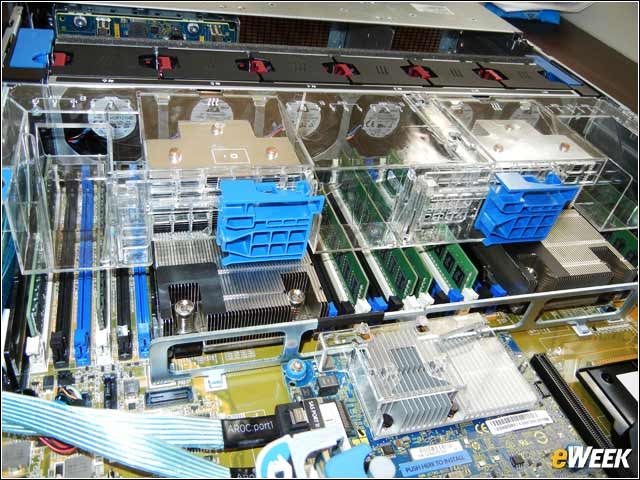
5A Clear View to Airflow Control
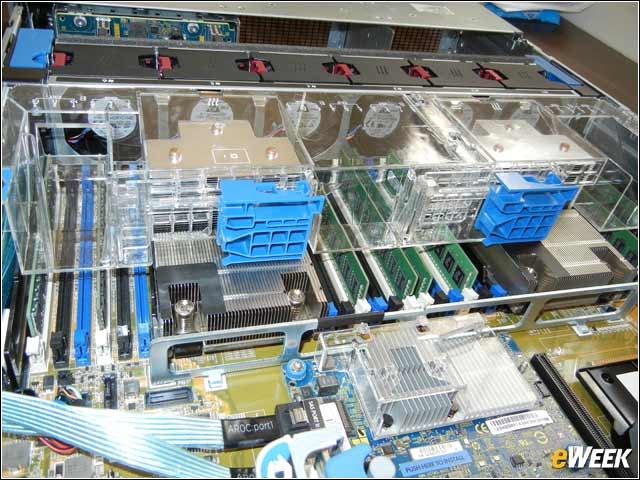
The clear plastic rectangular object is the airflow baffle that directs air from the fans so that the proper parts of the server are cooled as needed. This baffle is clear so that visual access is easy, and it’s easily removable so that the computer can be serviced. The two blue rectangular objects on the baffle slide to the side to unlock it.
6Hot-Swap Fans

7Heat Sinks and Cooling
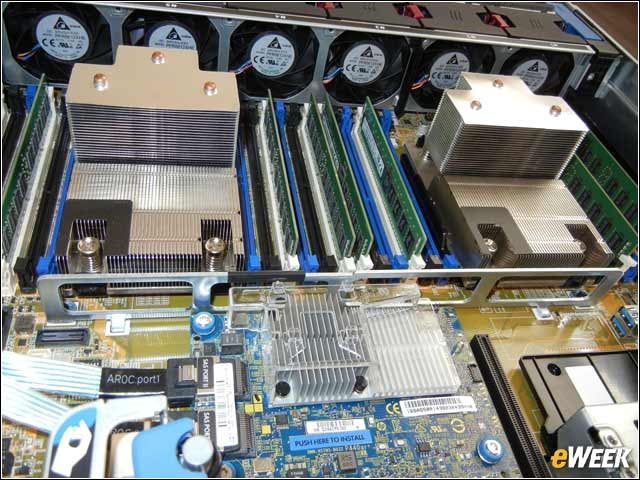
Shown here are the heat sinks and cooling fins for two Intel Xeon E5-2600 v3 processors with cores ranging from four to 18. You can also see the DDR4 dual inline memory modules (DIMMs). This server can support up to 768GB of RAM. On the far right side of the photo you can see two blue internal USB 3.0 USB connectors.
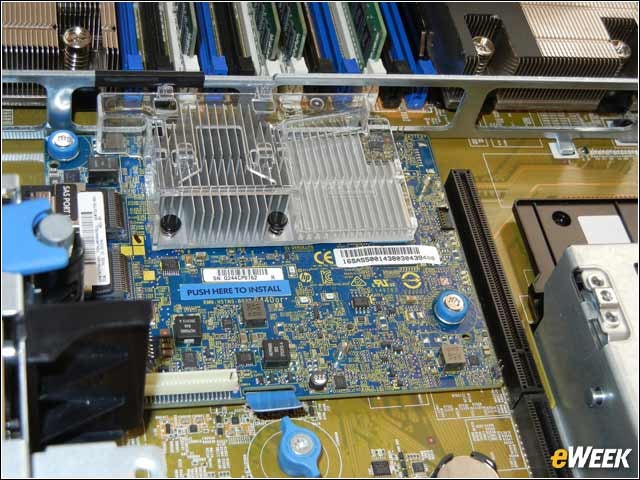
8Driving Force
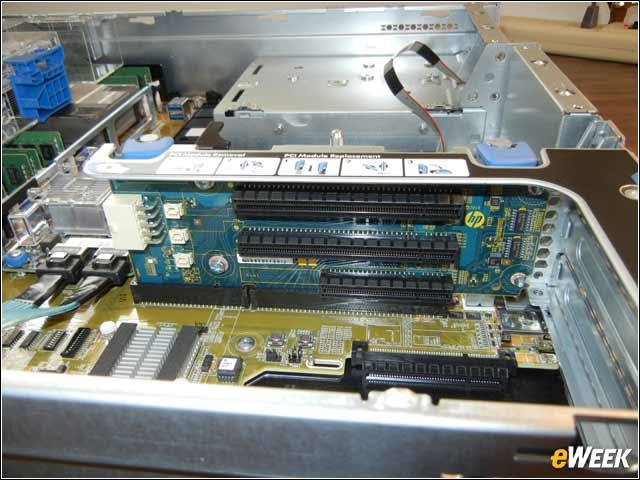
9The Expansion Riser
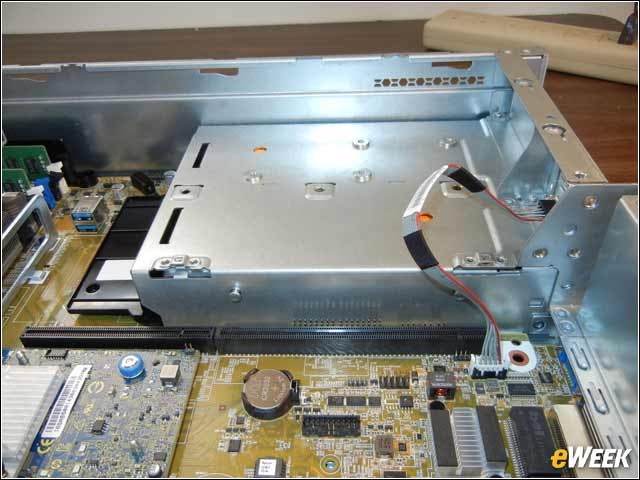
10Power to the Server
11Expansion Point
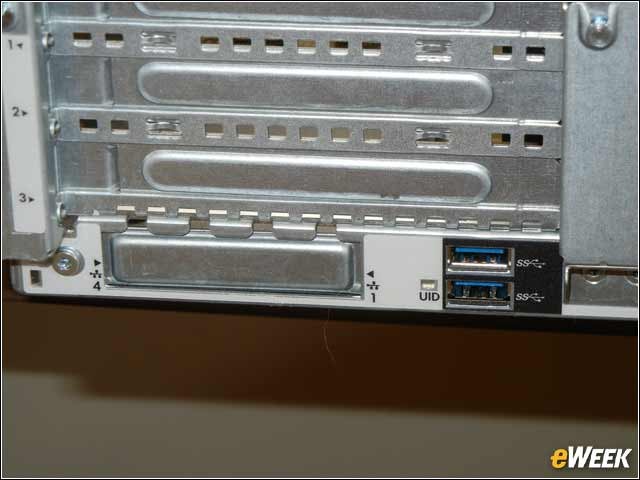
On the lower left side of the ProLiant DL380 Gen9 you see the expansion slot covers for the PCIe riser. Below that is a space where you can install additional Gigabit Ethernet ports, which are optional. Also in that corner are two more USB 3.0 ports and a UID light that can be lit to help technicians locate which server out of many may need added attention.
12Communications Ports
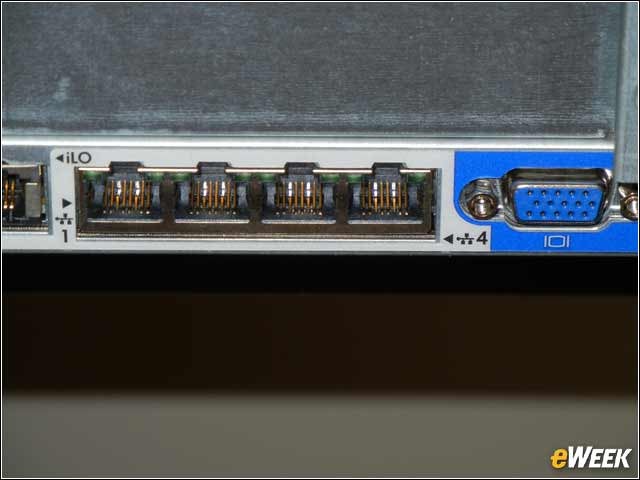
Near the center of the rear panel of the DL380 are four Gigabit Ethernet ports. The blue connector is for a VGA monitor connection. Just shown to the left of the Ethernet ports is an RJ45 that’s for the Ethernet connection to the server’s integrated lights out (iLO) management system. HP’s iLO is designed so that added capability can be added as needed.
13More Cooling
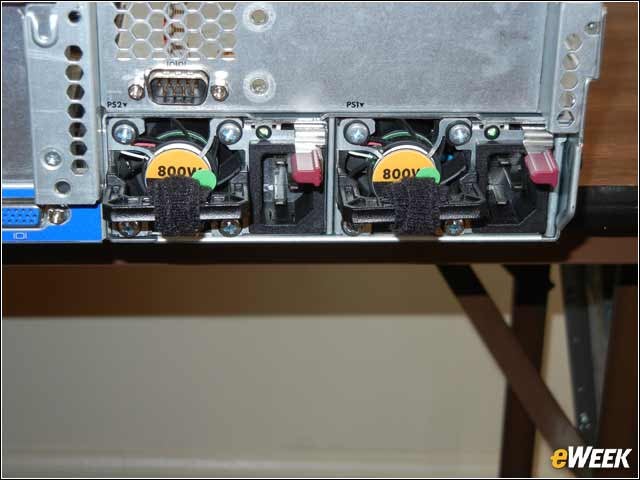
The two fans on the rear of the DL380 are there to cool the power supplies. Adjacent to each fan is a power connector and a cable management support. Note the Velcro ties that are there to keep the power cables from being knocked out by mistake. There’s also an RS232 serial port above the left fan, but it’s optional. You can remove each power supply by moving the gray handle to the left and pulling.